











































Wallpaper with a twist
-
Categories :
Projects









I like to think outside the box and try to turn things upside down. It doesn't have to be ultra avant-garde, but just a slightly different and skewed angle on things. I have always been fascinated by interior design and how you can push the traditional lines a bit, and fortunately we live in a time where the boundaries are more or less blurred.
I had some white doors that I think we’re very white and boring in their appearance, so I decided to 'pimp' them up with some wallpaper.
I don't have pictures, posters and paintings hanging on my walls. I like to implement the different visual expressions in the interior design of a room, so that they become a permanent part of the furniture. It can be both in strong and subdued ways, as long as there is some kind of connection. Interior design ‘’décor’’ is of cause a matter of taste, but I think that just makes it all the more exciting.
My own taste is colorful, and this is also expressed in my own home. I don't have colors on my walls. I chose that the colors should be outside the white walls. On the other hand, the colors I use must be very penetrating and clear in their expression. I think of the white walls as my my canvas, which I plastered with colors in the form of colorful furniture, lamps and wallpaper - a bit like a painting.
I chose a wallpaper from Osborne & Little called Tiger Grove, designed by Matthew Williamson. It is a panel wallpaper, which means that you get 1 roll, that you divide in 3 peaces of wallpaper. Then you can to put them next each other to form one picture. You can then continue this pattern around the room so that it becomes a coherent pattern. I chose it precisely because it comes in 3 pieces, with a width of 70 cm. It suited my 3 doors well, as each door could then get one of the 3 pieces, and if you put the 3 doors up next to each other, they would form a unified picture.
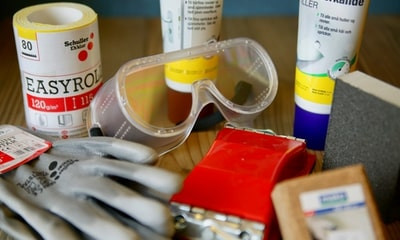
First, hinges, door handles (and in my case round windows) were removed, so it was easier to glue wallpaper on. The doors were factory finished with a smooth white paint. After a few trials with wallpaper paste and wallpaper, I found that it was necessary to fine-sand the surface to make it appear matte. It made the glue adhere much better to the surface.
The next step was to ad glue to the surface of the door, and gluing the wallpaper. The glue was distributed in a thick and uniform layer. Subsequently, the wallpaper was put on, using a wallpaper brush and rubber scraper. I worked from the inside out to avoid air bubbles. It can be a big help if there are 2 of you during this process, as it makes the work easier. One to hold, and one to process the wallpaper properly on to the surface.
The wallpaper banners were a little too wide and at the same time too long, so the excess wallpaper was cut off with a sharp hobby knife. The rolls come in approx. 3 meters long, so there was a meter of money left over. I chose that the excess should be cut at the top of the design, as I thought it fit best. The excess glue that had got on the edges of the door was wiped off with a wet cloth, and then the door was left to dry for a day.
The next day, hinges, door handles and windows were fitted and then it was ready to fit into its frame. The result was just as beautiful as I had dreamed of, and I can highly recommend others to try the same.
There is one thing that I am considering here afterwards, and that is to glue/varnish the transition between the wallpaper and the door, right on the corner where the wallpaper is cut off. After all, you tend to use your hand to close the door, using the door leaf, and then, if you are unlucky, you can end up tearing up a bit of the wallpaper at the edge. To avoid this, I will try an acrylic varnish as a binder, but only just in the transition, so not much needs to be applied. Alternatively, you could use clear narrow tape, I think. So far, however, there is no problem with the transition - fortunately.
BB
Share this content
